Wednesday, July 27, 2016

Drifter

 Drifter - SOLD
12" x 24"
oil on panel, framed


On July 16th, I spent the afternoon painting at the Wooden Boat Museum of Newfoundland and Labrador.  With my connection to boats, what better place to demonstrate a boat painting than this museum and I was delighted to accept their invitation for the 3rd year.  Surrounded by traditional, hand built wooden boats of all kinds, I swear the atmosphere helps the painting flow.
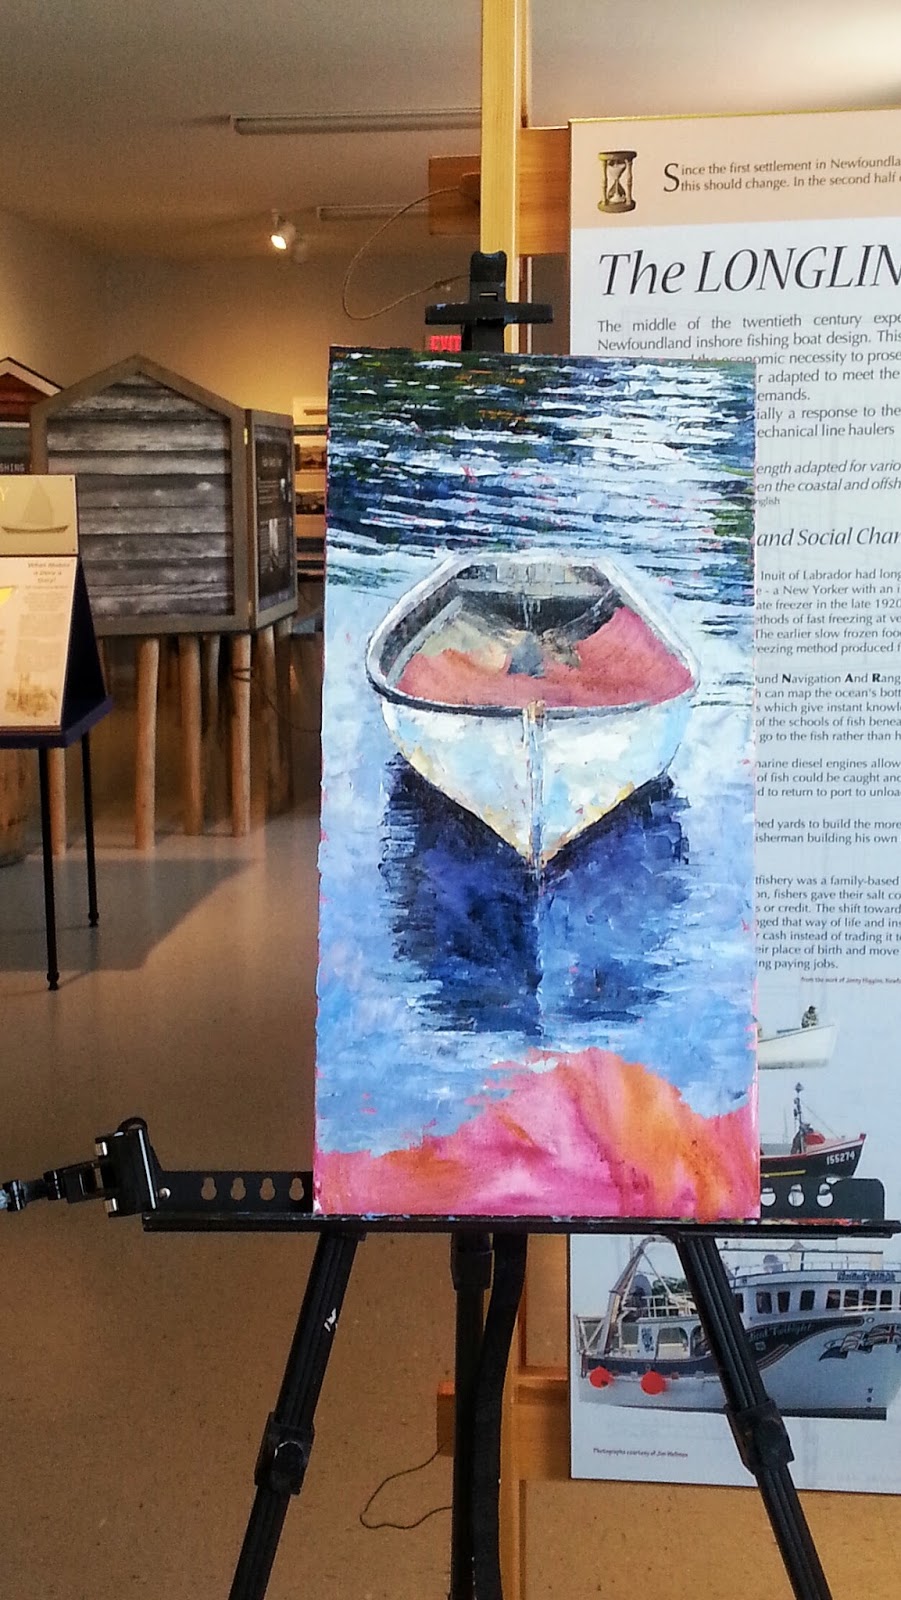
Painting progress shots at the museum

I chose this little punt to demonstrate with a palette knife and, between conversations with visitors, had about three quarters of it laid in by the end of the afternoon and added finishing layers and details in my studio.  Painting in public is a great way to talk about your work and share some of the techniques and process.  I brought a couple of finished paintings so people could see them and their texture close up.  Impressionism is a unique technique that really shows its impact when viewed from 8 - 10 feet away, an appropriate viewing distance for most paintings.  Up close, the painting becomes almost abstract with sections of colour laid down one against the other in a mosaic that magically comes together when you step back.

Painting in public, for me, doesn't hold a fear factor.  In fact, I love explaining the process to people, and even letting them try their hand at palette knife painting.  People are genuinely interested and I find that if you are engaged with your work and comfortable with your medium, that comfort level translates into trust and approachability and wins out over any sense of discomfort that could arise.

Yes, of course, interruptions can disrupt the flow of painting, but those breaks are welcome, not intrusive in this situation.  I can see if I was working in the open air and had a definite goal in mind for a painting, a string of questions could be frustrating, but in this situation, I see my role as that of educator and demonstrator.

If you've never tried working in public, do.  People are a lot more interested and supportive than you think they will be.  And its a great way to show your work to the world.


Tuesday, July 26, 2016

Paint, scrape, repeat.


“I’ve always tried to hide my efforts and wished my works to have the light joyousness of springtime which never lets anyone suspect the labours it has cost me.” (Henri Matisse)
I seem to be scraping a lot of paint lately, which is a good thing.

Realizing my mistakes, adjusting to meet my vision and not settling for "okay" pushes me to find solutions and really think about what I'm putting down in paint.  Yes, the painting I'm working on looked superficially good, but inside I know I can do much better, so I push myself even when I don't want to redo something.  And I'm always glad that I spend the extra work time rather than settling for a mediocre piece that could have a detrimental effect to my reputation if let loose on the world.


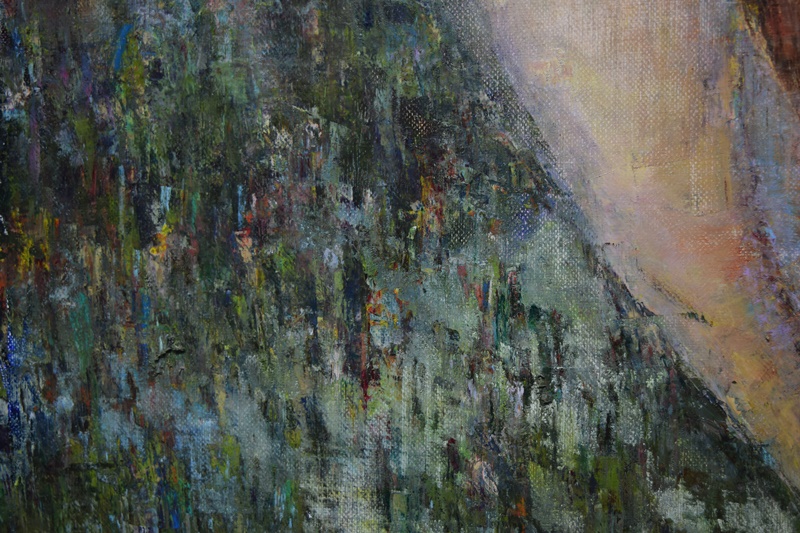
This image is a crop of the block in of a painting of a drying cod that I'm working on.  The initial stages were fine, then I overworked it. Scraping back the paint, all except the top couple of inches - and in palette knife painting this is a big sacrifice of paint - provides me with a gift in return.  The removal of the paint leaves stains of diluted colour in exposed canvas as well as shapes in the background and shows me that I should change my palette to a higher key to harmonize the piece more effectively.


Taking a leap of faith and reworking as needed is a big part of the painting process for every artist. Revealing the underbelly of a painting is necessary sometimes, to reach the vision that only the artist can see.

Read some words of advice on reworking paintings by Robert Genn in The Painter's Keys.


Thursday, July 14, 2016

Spirits Sheltered


Its exhibition season in the summer here and the last couple of weeks have been busy, along with regular painting, private teaching and just life in general. 


On July 9th, I attended the opening of Spirits Sheltered at Salmonier Nature Park.  I participated in this exhibition with other instructors of Anna Templeton CentreSalmonier Nature Park is a provincial wildlife rehabilitation center where visitors can hike a 3 km boardwalk trail and view wildlife along the way.

I explored new avenues in this exhibit as boats and water, my usual style, weren't appropriate. I put two pieces into the exhibit.  The first a palette knife painting depicting the dense tree coverage throughout the park which is home to so many animals.  The light coming through the trees is what caught my eye and the quiet of the woods, inspiring the title, "The Cathedral".

 
The Cathedral
14" x 18"    oil on canvas


The second piece is a relief print of a cross cut tree stump.  There was a fair bit of work and learning that went into the piece both in prep and after the printing.  I added colour with watercolour pigments and the final touch was gold leaf.  The wood is a Balsam Fir, known locally as Var.  A process shot of the printing as its pulled off the wood is shown in the poster for the exhibition.  More of these prints will be available soon.  I'm waiting for an order of Japanese papers to arrive and Canada Post keeps threatening strike action.  Keep your fingers crossed.

Where The Light Gets In
Multimedia on Japanese paper   8" x 10"

The title of Where The Light Gets In was inspired by the Leonard Cohen song of the same name.


Multimedia on Japanese paper   8" x 10"

Funds raised from this exhibition help support Anna Templeton Centre, Salmonier Nature Park and the artists.  There is a wide range of styles and interpretations of "Spirits Sheltered" and the exhibit runs until October 7th, so lots of time to visit, walk the trails and see the exhibit yourself.

Saturday, July 09, 2016

The Divine Sarah


 The Divine Sarah - SOLD
12" x 12"  oil on canvas

Life begets life. Energy creates energy. It is by spending oneself that one becomes rich.

Nothing shouts summer more than a big, blowsy pink peony.   They are beautiful, but a terrible design, being so top heavy.  Just at their peak, a wind or rain storm comes along and leaves them tattered on the ground.

This pale pink variety grows in my garden and is named after Sarah Bernhardt the famous actress of the late 1800s, early 1900s.  Sarah was known as "The Divine Sarah" and once called the most famous actress of all time.  Known for her melodramatic acting and wild lifestyle, she was memorable.  I think she would approve of this painting.

Now a little treat, a clip of The Divine Sarah in action.


Tuesday, July 05, 2016

On Cue

 On Cue
8" x 8"  oil on panel

I didn't spend time in pool halls in my youth for a couple of reasons. One, because they weren't something that interested me and two, I'd be major trouble at home if I was found in one.  That doesn't mean that I don't enjoy pushing balls around on a table, whether the game is called pool, billiards or snooker. (I never did understand the differences between the names or perhaps they're simply geographical.  Maybe someone can tell me.)

But I do love drawing and painting spheres.  They are deceptively simple looking, but in reality very complex.  Painting  light and shadow to create believable roundness takes observation and patience.  Creating curved shapes with a straight edged knife is easier than you think and more about considering edges and not making them tight and hard.


I added a speeded up 8 minute film of the painting of this cue ball. You can see the build of paint layers and perhaps some of my ever changing thought process as I progress through the piece. There is no sound.  I will be making a longer (slower) version of the video available soon at low cost that will walk viewers through the colours, techniques and decisions made during the painting.

The original painting is available in my Etsy store.

Thursday, June 23, 2016

Seven boats


I've just realized that I didn't share the paintings from my recent group exhibition.  Time got away with me as deadlines for other paintings and projects are looming.  This exhibition was different in that it was a transition from my usual larger gallery pieces.  There were six 12" x 12" and one 24"x 24" in oils available.

The opening on June 10th was busy and fun with lots of people and conversation and a sale for me which is always nice.  The exhibition came down on June 20th, but my pieces are still available at Peter Lewis Gallery and another sold today.

If you're in downtown St. John's, drop in and see the pieces in person as well as art from a variety of local artists.  And if you're not near, you can see a short virtual view of the exhibition on Peter Lewis Gallery Facebook page.


Directionally Challenged - Sold
Wine glasses started to accumulate on the mantel on opening night

Sitting in the Morning Sun - Sold
 A red dot is always nice at an opening

 Left to Right:   The Channel; Off the Collar (sold) ; Veiled (Sold): Tidal Pools (sold)

 Right side painting: Lobster Red - Sold

 Photograph:  Peter Lewis Gallery

Monday, June 20, 2016

All That Glitters

 All That Glitters  -  SOLD
11.5 x 14 graphite on paper

Its been awhile since I did a "real" drawing.  I do lots of sketching and always forget how much I enjoy really getting into a solid drawing until I do one again.  Classical drawing was my background and, as with every artist, we move laterally over time into other areas.  Painting and printmaking sidelined me from drawing as much as once did, so its a pleasure to complete this piece.


I did a study a few weeks ago for this piece in a Moleskine sketchbook, then decided to proceed with the drawing.  Yes, all that water was a little tedious at times, but its part and parcel of making the whole piece work.  Abandonment is the trademark for those who choose it when the going gets tough.  Or boring.

I used Strathmore Windpower paper for this.  The jury is still out on whether or not I really like this paper.  It has a medium grade which was perhaps a little grainy for this drawing, but seems fairly resilient and receptive to pulling out highlights with a kneaded eraser without causing damage.  I used Blackwing 602 and Staedtler 2B and 4B pencils to complete the piece with many, many, many light layers to build values.  Pressure is key to building layers of graphite before you reach saturation point.  The lighter the pressure, the more layers you can achieve and the further back you hold the pencil, the less chance you have of pressing hard and destroying the surface.

Friday, June 10, 2016

Exhibition opening

http://www.peterlewisgallery.com


Tonight is the opening of a new group exhibit at Peter Lewis Gallery, where I will have seven new boat paintings revealed.  This is a new format with the gallery, showing a larger painting accompanied by 4 - 6 smaller pieces from each artist. My pieces are 12" x 12" and 24" x 24" and I'm looking forward to seeing how the show is hung.

I'll share my paintings with you after the opening and you can catch a glimpse of one of mine on this poster. If you're near St. John's, drop by for a glass of wine and see the work of some wonderful local artists.  I'd love to meet you there!

Saturday, June 04, 2016

Building a complex sketch


Flatrock, the little town of about 1,500, where I live in Newfoundland, is home to some unique rock formations and geology going back a million years or more.  The smooth flat rocks stretch out from the land into the sea and were supposedly used for drying cod many years ago.  Other rocks are like stacks of huge square boulders lying on their sides, one on top of the other.  I'm not a geology expert but love looking at the rocks and their coverings of lichen, additional boulders that the ocean has deposited onto rock shelves and, of course, the gulls' antics around the rocks and water.

Drawing rocks is no different than any other subject and if there are a lot of them I break the scene down into sections to make it easier to deal with.  Drawing intricate scenes can be perceived as difficult, but in reality it isn't.  It's time consuming and realizing that, I make a commitment of slowing down and studying a scene carefully which makes the drawing a lot easier than rushing and ending up with a poor sketch.

 Flatrock waterfront

This was my vantage point a few days ago as I sat in the car to sketch some of the rocks.  I day was beautiful but the wind was just too cold to sketch outside for long, so as my hands were getting just too cold to work well, I took to the comfort of the car out of the wind.

I did a pencil sketch on site which took about 30 minutes, then took the piece home to finish it in the studio.  I added ink over the pencil, then coloured pencil.  Colour notes in the sketch book for rocks and ocean along with the photo to enhance my memory provided the colour cues I needed.  And if I am stuck I can just wander down the road and have another look in real life.

Pencil


Ink

Friday, May 20, 2016

Cloudy with a chance of rain

 Cloudy with a Chance of Rain - SOLD
oil on canvas panel 6" x 6"

Its heading towards the Victoria Day long weekend in Canada. Yes Canada still celebrates Queen Victoria's birthday, bless her. She was born on May 24, 1819. Its also called the May 24th weekend or just the May long weekend.

Its the first official holiday of summer where people head to the woods or cabins for camping and boating. The weather can be unpredictable of course and it can be scorching sun, showers, torrential rain or we could have flurries. Its what makes Newfoundlanders a hardy bunch.

Thursday, May 12, 2016

Waiting for Spring - a video tutorial

 Waiting for Spring
6" x 8" oil on panel
Available from my Etsy store - $70 + $5 shipping

I've been testing my video making skills, making a tutorial on painting a terracotta pot.  I learn something new with each video that I make and am far from perfect, but enjoy the process and the learning.

You can have a look at the tutorial in the YouTube video below and see more on my YouTube channel.


Thursday, April 28, 2016

Proportional dividers


For people starting out in drawing who aren't confident in their drawing skills, there are several ways of transferring a subject onto a piece of paper.  Tracing, projecting, gridding are all used in varying degrees and a proportional divider is another option.


This is a simple tool that  provides accuracy for drawing and can be used to increase or decrease size. It can also be used as a check for measurement after freehand drawing if something doesn't look quite right.

Once the scale size is decided on, the central screw can be fixed in place. The closer to the smaller end of the divider that the screw is placed, the larger the proportion of the drawing will be and vice versa.  This setting should not be changed during measurements for the drawing. The small ends of the divider are used to measure the height or width of the subject.  The larger end is used against the drawing surface and small dots or lines are made to indicate the measurement.  These measurements are made throughout the drawing, depending on the number of objects in the piece.


Of course, the usual plumb lines for proportion and measurement are needed to ensure objects align as required.  Angles are usually determined by confirming an angle with a pencil then moving that same angle to the drawing.  Where points intersect will be the measurement test and can be adjusted as needed.


If drawing from life, it is crucial that your view point never changes and that your arm is locked at the elbow for each measurement.  If either of these change, the drawing will be not be accurate.  If using a photograph or drawing from a computer or tablet screen, you can measure direct from the image, scaling up or down as required.  Note if you use a computer screen: make sure that the photograph size is not enlarged or reduced if you draw over several sessions.


While tools can make life easier in setting up drawings, they shouldn't be relied on for daily use and can never replace the hand/eye drawing skills that develop over time.  It is well worth learning to use the classical techniques for drawing, proportion and measurement and use tools such as the proportional divider for complex pieces or to check for accuracy in line placement in freehand drawing.


The divider I used here is from Accurasee in the USA and can be ordered online.


Saturday, April 23, 2016

Spring cleaning artist tools

Petty Harbour II and St. John's Harbour


No, these are not the tools that you make art with however, indirectly you do, as they are an integral part of what you create. They are the written tools that are essential to every artist who is involved in presenting art publicly.  An artist statement, an art resume and a biography are the documents that most galleries, juried exhibitions or competitions ask to accompany image submission.


The artist statement
This needs to be updated at least annually, more if you're very active in the art world.  The one that seems to provide the most headaches is the artist statement.  Basically, it is a short explanation of the thought or meaning behind the art that the viewer is seeing.  It can be full of "art speak" which the video below pokes fun at so well, proving just how confusing and pointless it is to over explain in terms that aren't clear.  Thankfully, the trend now is usually more towards simple explanations of what, why and how you create what you do.  A couple of paragraphs at best works well, as no one will stand there and read for 20 minutes. The statement and/or biography are often placed next to your work in a gallery or show.


If your style and medium never change, it makes life easier to create and tweak artist statements, but artists evolve over time, special events, themes or requests happen and for those a different artist statement is needed.


The art resume
An art resume is a replica of a work resume, but all art related. There should be no reference to a position outside the art industry on this document unless it is linked closely with the art world - i.e. if you were a gallery curator, museum collector, etc.  Education, training, exhibitions, grants, etc., are all listed.  Art resumes can take up a dozen pages or more which are fine for your own records, but most organizations who want to see that document are looking for information on recent work and activities and restrict submission to three pages.  Less is more.  If you go for overkill and send in a dozen pages, you'll likely end up in the bin.


The artist biography
A biography is similar to an artist statement, only you're talking about yourself.  It consists of a couple of paragraphs that sum up your artistic background, involvement and activity and provide a snapshot for those wanting a quick overview of the artist.

You can view and download my working documents on my website at www.jeanettejobson.com


The elevator pitch
This is a sentence or three that sums up what you do if someone asks and you have a brief period of time to tell them - like on an elevator ride.  If you don't have your pitch made, its time to consider it.  Think of adjectives that describe what you do; what your strengths are or what do you sell or make.  What makes you unique?  You're create a visual image in words for your audience so they can "see" what you do.  It helps to have business cards as well as an image or two available to show, especially as mobile phones are so common these days, you can easily pop an image or two of your best work on there to have available.

What's my elevator pitch?   

 I am impressionist painter, creating textural paintings of boats and water in oils using only a palette knife.  I also teach classic drawing and painting techniques.

What is your elevator pitch?  Do you have an art resume, biography and artist statement that tell more about you and your work?

Sunday, April 10, 2016

Sailor's Delight

 Sailor's Delight
6" x 8"  oil on panel

How often we look to the skies to predict the weather and it often seems a much better predictor than the meteorologist reports that we are bombarded with daily.

This was a demo from a recent workshop for an introduction to palette knife painting.  The colour mixing and shapes are simplified and the sky forgiving in terms of shapes, making it a perfect subject for individuals testing the technique for the first time.

There are few colours that fit the need straight out of the tube.  They nearly always need a boost from another colour to adjust value or create the correct hue.  The use complementary colours and addition of colours that are unorthodox but the right value, add interest to the work.  Try throwing in a streak of a complementary colour, just a little, to give more oomph, you'll be amazing how it makes a painting sit up and demand viewer attention.

Thursday, April 07, 2016

Deadlines

 Lost
 24" x 36"
 oil on masonite

I've been busy creating and finalizing pieces for upcoming exhibitions.  Spring and summer are always crazy times for artists and coming out of the cocoon of winter is always a shock in terms of just how much work must be done.

But there is worth in deadlines, even if we complain about them.

Deadlines provide incentives to produce work and goals to aim for.  They push you to explore boundaries and experiment with new ideas. Without deadlines whether external or self imposed, I can wander around like a lost puppy or procrastinate until a deadline is lost.  Then I kick myself for wasting time or not paying attention.

Embrace deadlines and impose them on yourself regularly and see your production soar.   How to meet yoru deadlines?  You need to do a little planning and setting your own deadlines to meet a production time.

Here are some tips to help

  • Understand exactly what the deadline is.  June 25?  Ok, but 9am, 3pm or midnight on that date?  
  • Can you really meet this deadline?  There's no point in rushing work and not producing your best.  Consider carefully if trying for a deadline will make you crazy, make you create sloppy work or look unprofessional before you say yes.
  • Set you own goals within the time frame.  You can't produce everything in one day and deliver.  Set goals for yourself at daily or weekly intervals leading up to the final deadline.
  • Give yourself wiggle room.  Life happens and its beyond our control, so add some extra prep/work time for the project so that if the worst happens, you still have available time before the deadline.
  • Be prepared to do the work.  If you procrastinate or mess up, be prepared to do an all nighter or work extra hours to make up for lost time.


Sunday, March 27, 2016

Jelly

 
Jelly is probably considered old fashioned now and not sophisticated for children or adults to consume.  I remember it with fondness from childhood and my own children's childhood as a treat.  Jelly and its more elegant, but less tasty cousin, blancmange.  Either one wasn't served in just any old bowl, it had to be in a jelly mould which came in all sizes and shapes.  I recall a glass rabbit mould which I loved but it must have gotten broken somewhere in the passing of time.

I found this old pressed glass mould in a cupboard when clearing my mother's house.  I remember it being my grandmother's, who lived with us, and it held many a sweet treat.  In the 60s jellied salads became the rage.  They weren't healthy but got vegetables into reluctant children.  I recall one made with pineapple and grated carrot in lemon jelly and another with lime jelly and green peas.  I know...yuck right?  See here for some "interesting" salads that were made with jelly.

The bubble topped jelly mould was common and made anywhere from the 1930s to the 1960s.  Seeing the contents layered through the glass made the eating more interesting perhaps.

Now as for drawing glass, its one of those perceived difficulties.  Its all about light and shade and picking out the specific areas of each as well as those subtle variances of mid tone with bright shots of white highlights that made it work.  Observation is key for glass, but very achievable if you take your time.  This is a  quick sketch in my Moleskine with a few wonky angles as I didn't measure, but I see it appearing as a larger charcoal piece in the future.

Saturday, March 26, 2016

The Roaring 20s

 Auntie Gertrude

I've been going through some old photos of relatives and came across rather battered one of a great aunt.  The photo was taken when she was around 18 or 19 at the time, sometime in the 1920s. I love sketching relatives from the past.  Looking at clothes and hairstyles and seeing what physical characteristics are passed down from generation to generation is interesting.

The hairstyle fascinated me and made me do a little research on hairstyles of the 1920s.  This is when the "bob" came into fashion which was a trend that caused a lot of controversy and perhaps was a push into women's rights and a break from the patriarchal society rules of the time.  Film stars of the time, such as Clara Bow, jumped on the bandwagon and I would imagine that my great aunt, like any other teenager, mimicked trends and fashion - and rebelled a bit too.  Apparently the introduction of the bob also spurred the creation of the bobbie pin.
I remember my great aunt as having the characteristic thick curly or wavy hair that ran in my mother's side of the family (I seem to have gotten the dead straight gene but kept the thick part), so cutting her hair into a bob must have been problematic in terms of maintenance as most curly or wavy hair has a mind of its own.

Thursday, March 24, 2016

In the Pink

 
 In the Pink - SOLD
5" x 7"  oil on masonite

For a private workshop this week I looked through my reference images for something different, yet not too challenging, for painting.  I don't often paint flowers but with Easter/Spring in the air, I thought a tulip might fit the bill.  And it did.  The individual who I was teaching had not painted anything previously and never used a palette knife but did a fabulous job with her first painting of a tulip as you can see in the image below.


Its interesting to see how different people approach painting, especially those not influenced by previous painting experience.  Some have a natural ability to see colours and shapes, while others struggle with that observation. Practice, of course, brings the training of eye/hand that helps with seeing shapes and judging colours.  Each person brings their own unique vision and painting style to a piece and its wonderful watching it unfold.

Sunday, March 20, 2016

Advice to my younger self

 Self portrait - 1975
graphite

Hindsight is 20:20 and wouldn't it be nice to be able to mentor your younger self and provide the sage advice that time and experience provides?

From the artist's view point if I could advise my younger self here are some things I'd say:


  1. Get a thick skin quickly.  There will always be critics and they will wound you to the core. Get over it.  As you move up the art ladder, there will be people who try to knock you off.  This will come in a variety of forms, from blatant plagerism and copyright theft down to the jabs and remarks spurred on by the green gods of jealousy and hatred.  Ignore your critics and those intent on trying to hurt you. Keep your vision strong and your belief in yourself and your art stronger.  But never be afraid to fight for what is right and what is yours.
  2. Become identifiable.  Perfect your technique and find your style and medium. Nothing gets you more rejections than poorly executed art, art that encompasses a dozen different styles and mediums or art that looks identical to 20 other artists. Your style belongs to you.  You work hard to achieve it, so guard it like a dog does its bone.
  3. Practice your art.  Work in your studio daily, no matter what.  Practice equals beautiful art and it inspires creative work.  As Chuck Close said, "Inspiration is for amateurs.  The rest of us just show up and get to work."  Create a body of work of 15 - 20 pieces.  Then create another.  And another...
  4. Learn the art of marketing yourself.  No one else will do it for you.  Not unless you pay them a lot of money.  Promote yourself and your work constantly. Exposure to eyes is what makes art visible.  Keeping it in a studio collecting dust will not benefit you, or the world.
  5. Share your knowledge.  No, don't sell the farm and reveal everything, but share your knowledge of technique to other artists coming after you. After all, technique doesn't belong to you, you are only a medium through which it is passed down from artist to artist as it has for hundreds of years.  It is your duty as an artist to show others artistic techniques.
  6. Create what you love.  Don't be swayed by what subject sells in a gallery, what a best selling artist paints or what the current trend is in art.  Create the art that resonates within you.  It will sell if you want it to.  Be patient and wait for the right person to claim it.
  7. Nurture yourself.  Surround yourself with beautiful things, beautiful surroundings, beautiful people.  It need not be beauty in the traditional sense of pleasing to look at, though that is always pleasant, but more the people and objects that are pleasing to the soul.  Artists create best when their soul is satisfied.  
  8. Ring the bell.   Leonard Cohen once wrote "Ring the bells that still can ring. Forget your perfect offering. There is a crack in everything.  That's how the light gets in."  Don't strive for perfection.  Real beauty lies in imperfection and uniqueness. 

Friday, March 18, 2016

Late Afternoon

 Late Afternoon - SOLD
5" x 7"  oil on panel

"All afternoon in the deck chair, I try to describe to my notebook the colors of the water and sky. How to translate sunlight into words?"
Author: Frances Mayes
 
Dusk and dawn are the artist's most prized times of day because light is beautiful then.  The sun is low in the sky, casting long shadows and tinging the landscape with amber light.  Those moments just prior to dawn or before dark when light is barely there adds more mystery.  Shapes are indistinct and colours muted.

Watching the light and choosing the right moment to paint or capture the light with a camera opens up a world of beauty.